I recently posted our DIY bathroom remodel project before and after pictures on my Instagram and received so many messages asking about how we did this. Believe it or not, this was actually something we were able to complete in a weekend! Tristan and I have done a lot of projects since moving in, but this bathroom update was my favorite! I’ll give you the quick rundown on how we did this bathroom update on a budget in 2 days and the products we used!
Step one: Get some Inspiration
I have a Pinterest board for each room in my house with ideas on colors, decorations, and anything that seems to catch my eye. When we decided it was time to start on the bathroom, I knew I loved the white and gray color combo and and wanted to do some type of tile on the floor. I picked Garden Trowel Gray from Magnolia Paints at Wexford Ace Hardware, and bought Homax Tough as Tile paint from Lowe’s for the wall tile.
Step 2: Prep Work!
First, remove everything from your bathroom so you have room to work! If you decide to paint your wall tiles, the prep work is SO important. I’m usually one to cut corners when it comes to prepping because I’m so excited to get started, but with this Homax Tile Paint, you must prep! The prep directions that come with this paint is pretty specific. We started by washing the tile, using steel wool, and drying with rubbing alcohol. We repeated this process twice. Make sure your tile is completely dry before starting to paint! If there is any type of residue left on the tile, your paint will not adhere in those areas.
Step 3: Paint your Wall Tile
We were nervous to paint the tile because this is a product we haven’t used before. I’ll be honest … the first coat is going to look pretty rough, especially if you are painting over a dark or bright colored tile. Once you roll the Homax Tile Paint on, you can’t go over it until it completely dries. The directions will explain this, but you’ll want to set your timer for 3 hours after the first coat is on, and start a second coat immediately at 3 hours. We did 3 coats on our wall. After your final coat is on, don’t use your shower for at least 48 hours!
Step 4: Paint Your Walls
We picked Garden Trowel Gray from Magnolia Paints to paint the walls in our bathroom. We got it made at Wexford Ace Hardware. I love this gray, it’s also in our guest bedroom and basement! Note: do NOT tape off the tile that you painted with painters tape! You cannot put tape or suction cups on the Homax Tile Paint.
Step 5: Tile
We ripped up the linoleum flooring with a heat gun, and decided to tile it! We chose 12x24in tiles in white and grout in Charcoal.
Step 6: Add New Fixtures and Decorate
Our old black and green vanity absolutely had to go! We picked this $99 white vanity from Lowe’s that fit our bathroom perfectly. I also picked new glass light shades and clear light bulbs to give it a more updated look. My Newfie in the tub artwork is from Etsy! This artist has this paintings in all different dog breeds!
Overall, we would rate the tile paint a 7 out of 10. It is a lot cheaper and less time consuming than retiling a bathroom, but is definitely obvious that it is painted. We were able to do this whole project including the new vanity under $400.
Be sure to follow me on Instagram for more ideas and inspiration on a budget!
If you are anything like me, you like to switch up your home decor often! There’s something that feels so good about changing and rearranging! I was in the mood to find minimalist Home Decor for my living room this past week and I am going to share all of my budget finds with you! I would describe my home style as cozy, neutral, and cohesive! In this blog post I will share all of my favorite home decor finds as well as share more about the projects we have done to complete this room and the color paint that we have used, too!
Getting Started
When we bought our 1950’s home a few years ago, we started with yellow walls and carpet. We have come a long way since then! Our first project was ripping up all of the carpet. This was a fairly large undertaking considering it covered the entire house. We we really hit the jackpot when we discovered hardwood underneath the carpet! Before we moved in, we had the floors redone with a natural finish and it was the best decision!
Next, we painted the walls and decided to do shiplap on the bottom half of the walls in our family room. Although there are different ways to do shiplap, we painted the boards before putting them up on the wall. For me, choosing colors was easy. I chose 4 colors for our entire house and have not deviated from them. This is the best tip that I tell anyone who asks: pick your color palette and make all of your buying decisions from there. By not moving away from the colors in my palette, all of my home decor matches nicely and flows from room to room. In our family room we have two paint colors. On the main walls of our house and hallways, we have used Southern Grown by Magnolia in matte. I would consider Southern Grown a perfect beige color. For the other walls in our living and family room, we used Renewed by Magnolia in matte. Renewed is more a of greenish-beige. Our shiplap is Atrium White by Benjamin Moore that is a nice fresh white.
Starting to Decorate Your House
When it was finally time to fill our room I was beyond excited! With our walls being shades of greens and beiges, I knew that I wanted to included browns, golds, and greens in my decor. If you are unsure where to start in your home decor journey, my best advice is to just start somewhere. If you see a piece that you are in love with, take it home and start building around it. For me, that item was my faux leather brown chair. When I saw this chair I knew that it was going to be coming home with me. From here, I began to choose items that I felt fit well with my chair.
I was on the hunt for the perfect console table to sit next to my fire place. This was tricky to find because I needed something that was not too deep. When I finally found one, I was so excited to bring it home. I immediately put my vintage entryway gold mirror on top and started to add items around it. I purchased photo boxes for the shelves that I use to hide some common things you may find in your family room: puzzles, books, remotes, cords, etc. The green boxes match my pillows perfectly, too.
Keeping Your Home Cohesive with Purpose
One way that I keep my decor cohesive in my house is by separating some of the pieces from each other so that they have a matching buddy across the room. One example of this is my black framed floral print. I have one by my mirror, and have the rest of the collection over on the wall by the couch in a grid style. This small decision was intentional to make my room come together. Another example of this is matching pillows across the room on different furniture.
This is a total side note, but as you can see, I’ve got a an extremely fluffy newfoundland dog named Sammy! Sammy keeps me extremely busy with all of his fur. A lot of the furniture and items I have picked have been based on what can be easy to clean and hide the mess that Sammy can leave behind! And for those wondering, we’re currently using the Pet Pro Shark Vacuum , however, we are constantly trying out new ones to see what works! We also use the Bissell deep cleaner for our couch.
I found my rug at a local discount store and fell in love! I knew it was the perfect color to bring into my family room. It’s simple and fun all at the same! One item in our family room that we use regularly is our rustic wooden blanket ladder. While this looks cute in the corner, it is also so functional and keeps us from having multiple blankets on the couch at the same time. One of our favorite blankets is the teddy blanket that matches our faux leather chair perfectly.
I am constantly changing and rearranging my family room and living room so I will be sure to take photos as it evolves! Be sure to follow me on tiktok and instagram for more home decor. Here are a few more blogs on our home projects! If you are interested in learning more about my newfoundland, Sammy, you can find him on tiktok, too!
*This blog post contains affiliate links and I may earn a small commission
If you’re looking to plan a summer road trip, look no further! If there’s one thing to know about me, it’s that I love a good adventure! Traveling has always been something that I have enjoyed, and exploring new places is so exciting. Tristan and I have traveled to 16 National Parks and each park has something special to offer. Of all of our National Park trips, I think our first trip out west was one of my favorites! In this post, I’ll explain where and what we did on our adventure starting in Salt Lake City and ending in Seattle and will give some guidance on what I believe you cannot miss when you visit these parks!
Day 1: Salt Lake City
We arrived in Salt Lake City from Pittsburgh, PA on the first day of our 7 day trip. Soon after landed, we headed straight to pick up our camper van. We rented our van from Escape Camper Vans. The company is known for having fun and bright painted vans to travel and sleep in. They offer a few different van sizes and we went with the Maverick which was perfect for the two of us and our things. After we got our ride for the week, we went to Walmart to buy our necessities for the weekend. Tristan and I like to pack light and purchase a few things for the week when we arrive at our destination, and then donate the items we purchased before we go back home! On our list was a cooler, some picnic foods, s’more ingredients, and cheap camping chairs. Our plan was to spend the day in Salt Lake before heading to our next stop. We got a recommendation to check out the Salt Flats – so we hoped in our colorful van and headed towards our first adventure! The salt flats were a little over an hour away from the city and were one of the coolest things I had ever seen! We explored the flats for a while and had a lot of fun taking photos before heading back to the city for some pizza and an early night.
Salt Flats Utah
Day 2: Wyoming Jackson Hole and Grand Tetons National Park
Day 2 started early for us – we didn’t want to waste any time! We grabbed Starbucks and headed towards Wyoming. The drive from SLC to Jackson was about 4.5 hours. We stopped along the way and enjoyed the mountain views. Our drive took us through Idaho which was a big win for me since I’m trying to visit all 50 states! We grabbed some sandwiches for lunch and pulled over along Snake River for the most breath taking views.
When we got to Jackson, we checked into our hotel and walked around town. This town was too cute with so many fun shops to check out! In the afternoon, we headed towards Grand Teton National Park and went to Jenny Lake. Be prepared to walk to the visitor center in the summer time, there were a lot of cars! We took the boat shuttle service across to Inspiration Point, a one mile hike, and then hiked an additional 3 miles back to the visitors center. This was my first time ever out west and I was truly in awe of the beautiful views. After our hike, we headed back to the hotel and found a local BBQ joint for a fun outdoor eating experience.
Day 3 & 4: Yellowstone National Park
Something that surprised me were how close Grand Tetons and Yellowstone are to one another! We woke up early this morning to be on our way and saw elk and bison on the drive! We took a small detour to check out Jackson Lake and I promise you, it will not dissapoint! Some of my favorite moments on this trip were when we just pulled over and took in the scenes around us.
As we got into Yellowstone, I will not lie to you, I was a little nervous! We lost service and the roads were super windy. Looking back, I wish I hadn’t been so nervous so that I could take in everything amazing around me! Yellowstone was like nothing we had ever seen before! We started with Ole Faithful and the geysers and then made our way to the Grand Prismatic hike. This hike was amazing for seeing the colors and learning about geysers. We continued on to the Fairy Falls hike, about 1.2 miles. I highly recommend this hike to the waterfall, but bring some water and snacks with you because it was longer and hotter than we expected!
Grand Canyon of the Yellowstone
We spent one night and 2 days in Yellowstone National Park. On the second day, we drove through a huge part of the park starting on the southern part and ending on north west side. Yellowstone Lake and Grand Canyon of the Yellowstone were a must see spot during your visit! After leaving the park, we drove north a few hours and happened upon a campsite right on the Missouri River and had the entire place to ourselves. This night ended up being one of my favorites from the trip because it was such a lucky find and we were able to watch the sunset over the mountains.
Missouri River
Day 4: West Glacier
We woke up in our camper van and made some coffee and breakfast before starting our next piece of the road trip. We headed towards Kalispell which was a 4 hour drive. There were stores here including a Costco for us to regroup and buy any additional needs. We had planned to sleep at Flathead lake, which was beautiful, but at the last minute decided to make the rest of the drive to Glacier National Park to get a head start on the morning. We went to local restaurant for a nice dinner and stayed at the KOA in West Glacier.
Day 5 & 6: Glacier National Park
I was still sleeping in the back of the van when I heard Tristan start it at 4am! We wanted to get to the park early this day to make the most of it. After getting into the park, we pulled over at a small lake and make coffee out of the back of the van. We grabbed our folding camping chairs and brought them down to the water and watched the sun rise over the mountains. This was such a beautiful view
Next, we headed over to the Lake McDonald Lodge which was an amazing hotel. We talked to some local people who gave us some recommendations for the day. From here, we headed to Going to the Sun Road. Going to the Sun Road is not something I feel I can do justice to through this article! The views, the road, the elevation… it is incredible! GTSR takes you from West Glacier to East Glacier.
Our trip took place in the first week of July and it had just opened for the season, so be sure to keep that in mind when you’re planning your trip! We traveled to the summit of the road where Logan Pass Visitors Center is. We parked here and did hiked about 3 miles out on the Highline Trail. This trails length is 32 Miles if you are looking for a longer adventure! The views on this hike we gorgeous and we even had a snowball fight in July!
After getting back to the van at the visitors center, we continued east on Going to the Sun Road. We stopped at several overlooks and found a quiet place to eat lunch and take a swim! After probably 12 hours in the park, we headed back to our campsite for dinner and an early evening.
Day 6: Half Day at Glacier National Park
On the next day, we only did Glacier until about noon. The perfect hike for our time limitations what the Trail of the Cedar hike. This hike was about 2 miles in length, and the lake it leads to called Avalanche Lake is incredible. My best tip for this hike is to do it early if you do not want to slow down for others.
Highline Trail
Day 6 & 7: Seattle Washington
At noon on day 6 we started our journey towards Seattle, Washington. While you may think this part of the trip seems random, let me tell you why we did it, and why it’s worth it! First, on my quest to hit all 50 states, I needed Washington! Seattle has always been a city that we have wanted to explore. Secondly, the Escape Camper Vans had a drop off location in Seattle. Instead of us treking it back to Salt Lake, we decided to drop it off at another location. Day 6 was mainly driving. We played the license plate game to stay busy and just enjoyed looking out the window. We arrived in Seattle fairly late that evening so we didn’t get a whole lot, but planned for all of Day 7 to check out the city.
Pikes Place
The next morning we woke up and of course… we’re in Seattle so we had to get Starbucks! We went to the Pike Place where the original Starbucks is and had an awesome time walking through the markets. This was my first time on the Pacific Northwest and it was a really need experience. It wasn’t raining in Seattle while we were there and there was also great visibility. We bought ferry tickets to Bainbridge for lunch and walked around the cute town there. This was a fun way to see the city from the water. In the evening, we found a fun sports bar for dinner and did the needle. I was super nervous about the needle but wow, what an awesome way to see all of Seattle!
Seattle, Washington
Day 8: Seattle to Pittsburgh
Day 8 was the last day of our National Park trip and it was time to head back home to Pittsburgh. We cleaned out the van we’d been living in for the past week and dropped it off. From there, we took an Uber to the airport and did a direct flight back to Pittsburgh. This was a great time for us to reflect back on our amazing week and look through all of our photos.
if you’re looking for more travel tips and places to go, be sure to check out my other travel blogs!
My dogs love the outdoors just as much as I do! Like most people, my dogs share my same love for camping, hiking, and swimming in the lake! Below is a quick list of essentials I don’t leave home without for a weekend outside with my two dogs Sammy and Gibson
Dog Backpack
Sammy and Gibson have a designated bag full of their travel essentials so that they’re ready to go any time. Having a designated dog backpack has helped us stay organized and keeps us from forgetting anything important!
Tick Spray
The first thing I always pack for the dogs is tick spray. Ticks can be so hard to find in all of their fur and we don’t want to take any chances. In addition to spraying Sammy and Gibson, they also take a monthly chewable and have the vaccine, too.
Doggie Water Bottle
Keeping your dogs hydrated in the summer is so important. While I do enjoy the classic collapsible dog bowl for hiking, this doggie water bottle has been a game changer for us! I love that it has a bowl at the top and takes back in water that they don’t drink so that we don’t waste any on our hikes.
Poop Bag Holder with Hand Sanitizer
This hand sanitizer and poop bag holder is always in our backpack! It’s a great way to sanitize quickly after picking up after the dogs. This light up hand sanitizer holder with a dog and tennis ball is adorable, too! These are essential for hiking with dogs
Dog Treats
Sammy and Gibson are good boys and love to get rewarded along the way! Having a treat for them is essential for hiking or just being out and about with them. I always keep training treats with me for rewarding or any training opportunities that may come up along the way. Treats are also great distractions should I need to keep my dogs eyes and attention on me at any point in our travels.
Dog Toys
If there is water, then my Newfoundland is going to be swimming! Sammy loves the water so much. One of his favorite lake activities is playing fetch. We play with this floating toy for him to fetch.
Life Vest
If Sammy is lucky, there will be water to dunk in after at the end of our hike! Although Newfoundlands are bred for water rescue, it is always a good safety measure to have a life vest for your dog. The life vest gives me peace of mind, and let’s Sammy swim a little bit longer!
What do you consider your essentials for hiking with dogs? Reach out to us on Instagram or TikTok and let us know! If you love bringing your dog on adventures and hiking with dogs as much as me, check out this amazing glamping weekend we took our dogs on!
Your girl is married! Tristan and I have been together for 12 years and we finally tied the knot in October! We got engaged in Maine in 2019, and after Covid changed our wedding plans, we decided to go back to the state that is so special to us exactly four years later! Planning a wedding from 1,000 miles away was not exactly easy, but so worth it!
We started our journey in Portland where we got our marriage license and then headed up to Bar Harbor. Our October fall foliage wedding weekend in Maine was perfect! We did a sunset ceremony rehearsal followed by a lobster bake dinner. Tristan and I kept tradition by not seeing each other until the ceremony. I loved our morning ceremony because we had the entire day to explore Acadia National Park and spend time together and with our family. We had our cocktail hour on sunset sailboat cruise and ended the evening with dinner and moose tracks ice cream. The day was more than I could have dreamed of!
Our photographer, Jamie, was amazing! She helped us with our day-of itinerary and knew the park like the back of her hand! Her attention to detail was fantastic and she had so many creative ideas. If you or anyone you know is planning to do a New England wedding, Jamie is your girl!
See a few of our favorite photos below and be sure to pin them for inspiration. Check out my Instagram and Jamie’s for even more looks at this incredible day. I’ll be sure to post more details about our weekend from how we planned it to what we did to have an amazing day on a budget. I highly recommend eloping in Maine in the fall.
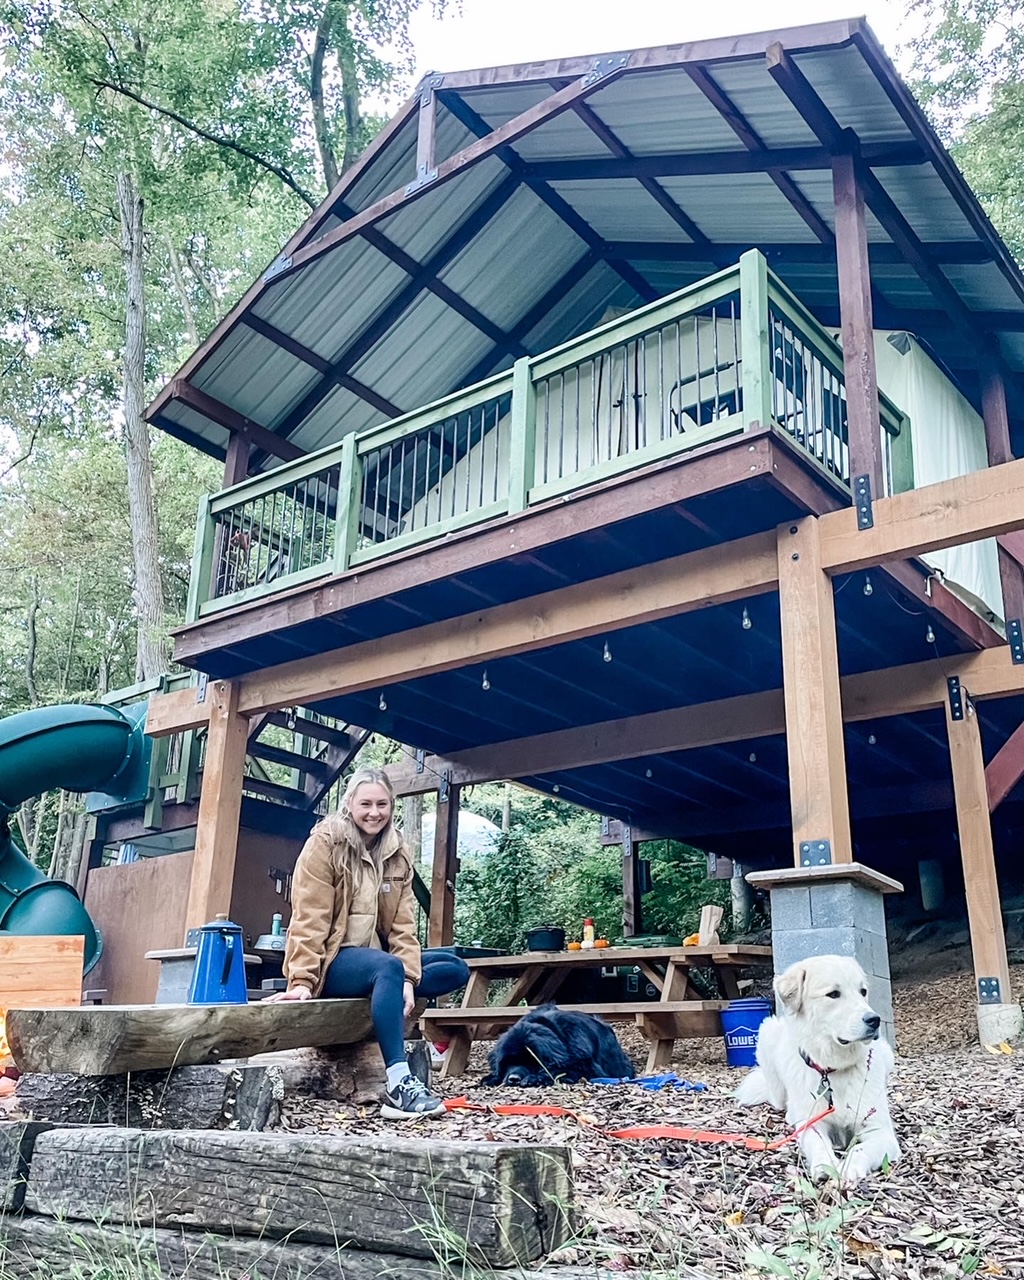
There is nothing I enjoy more than packing the car, putting Sammy and Gibson in the trunk and going glamping! When we got the opportunity to glamp at Airydale Retreat in Mill Creek Pennsylvania, I was beyond excited. If you don’t know what glamping is, it is glamorous camping. I describe glamping as the perfect mix of “roughing it” and comfort. While you can start a fire and star gaze, you also have a bed to sleep in and a bathroom. I highly recommend glamping for anyone who loves the outdoors but may not want to sleep in a tent. Airydale Retreat is the perfect place for couples, families, and friends to hang out, hike, and explore!
The Drive to Airydale Retreat
The drive from Pittsburgh to Mill Creek is about 2.5 hours, making it the perfect weekend getaway location. We had our car packed and ready to go and left on Friday around 3pm towards Airydale Retreat. The best part about glamping at Airydale Retreat is that they have everything you need from cookware to firewood to bedding. Because the glampsite offers so many amenities, we were able to pack pretty light! The drive out was beautiful! As we drove east we saw beautiful mountains and farms which got us even more excited to escape and relax. During the drive, I used Airydale Retreat’s helpful resources to plan hikes and food, and also took advantage of their Interactive Guide. They also offer a guide to breweries and wineries.
When we first got to our glampsite around 5:30pm at Airydale Retreat, it was obvious that we were going to have a beautiful and relaxing weekend. As we drove towards our hideaway at the glamping hut called “Cardinal 1”, we saw multiple unique glamping units from adorable huts to impressive domes. All of the properties have their own driveways and are far enough apart that each space has plenty of privacy.
Arriving at Airydale Retreat
When we first saw Cardinal 1, the first thing I noticed was that there was a slide from the top deck to the ground! I may be approaching 30, but this made me so excited. We let Sammy and Gibson out of the car and began to unpack our overnight bags and coolers. The glamping hut was absolutely perfect! It was so light and airy on the inside with its wood floors and canvas sides. It was clear every detail of this luxury glamping hut was thoroughly thought out. This glampsite is an Instagrammer’s dream!
It was a chilly evening in the Fall, making the first item on our agenda to start a fire and get cozy. If you know my dogs, you know they were loving this cold weather, but I needed my jacket and a blanket! While we were beginning to make our fire, Airydale’s owner Matt stopped by to greet us. Matt gave us a local delicacy as a welcome gift: moon pies! Matt’s big welcome and delicious dessert was so kind. It was clear he is incredibly passionate about glamping and wants every guest to have the perfect experience. Matt was full of recommendations for us with ideas for places to eat at and trails to explore.
Dinner and Bedtime at Airydale Retreat
Tristan and I love getting creative with camping meals and decided that we wanted to make campfire tacos. This is such a fun meal, and Airydale Retreat made cooking simple with our personal sink, skillet, and propane stove. Our tacos were delicious and we may or may not have snuck a few bites to Sam and Gib, too.
After dinner, we enjoyed the fire and the stars while we made s’mores and ate our moon pies.. The wildlife we heard was like nothing we have experienced before. We eventually made it back into our huts and got ready to sleep. We got cozy under the electric blanket while Sammy and Gibson sprawled out on the cold floor (their favorite thing!)
Morning at Airdydale Retreat
When we woke up, the first thing we did was open up our glamping hut to see the sun come up over the trees. It was the best quiet and peaceful morning. A detail I have not mentioned yet was how amazing the Cardinal 1 bathroom was. I was totally surprised by the running water and design of the bathroom. I think this is the first time I have ever been outdoorsy and cute at the same time because I had the space and hot water to get myself ready!
We only stayed one night at Cardinal 1 and I was so sad to say goodbye, but I know that I will be going back again soon! We packed our things, left a note in the guest book, and said so-long to the most adorable place we have ever stayed in. Just because we were leaving our hut did not mean our Airydale Retreat stay was over. We still had to explore all of Matt’s recommendations!
We started our morning with donuts at Allentown Donuts. This is an Amish establishment that sells donuts a few days a week and closes when they sell out. I truly mean this when I say I have never had a better donut in my life. We we a dozen to try different flavors and bring some home!
Hiking Near Airydale Retreat
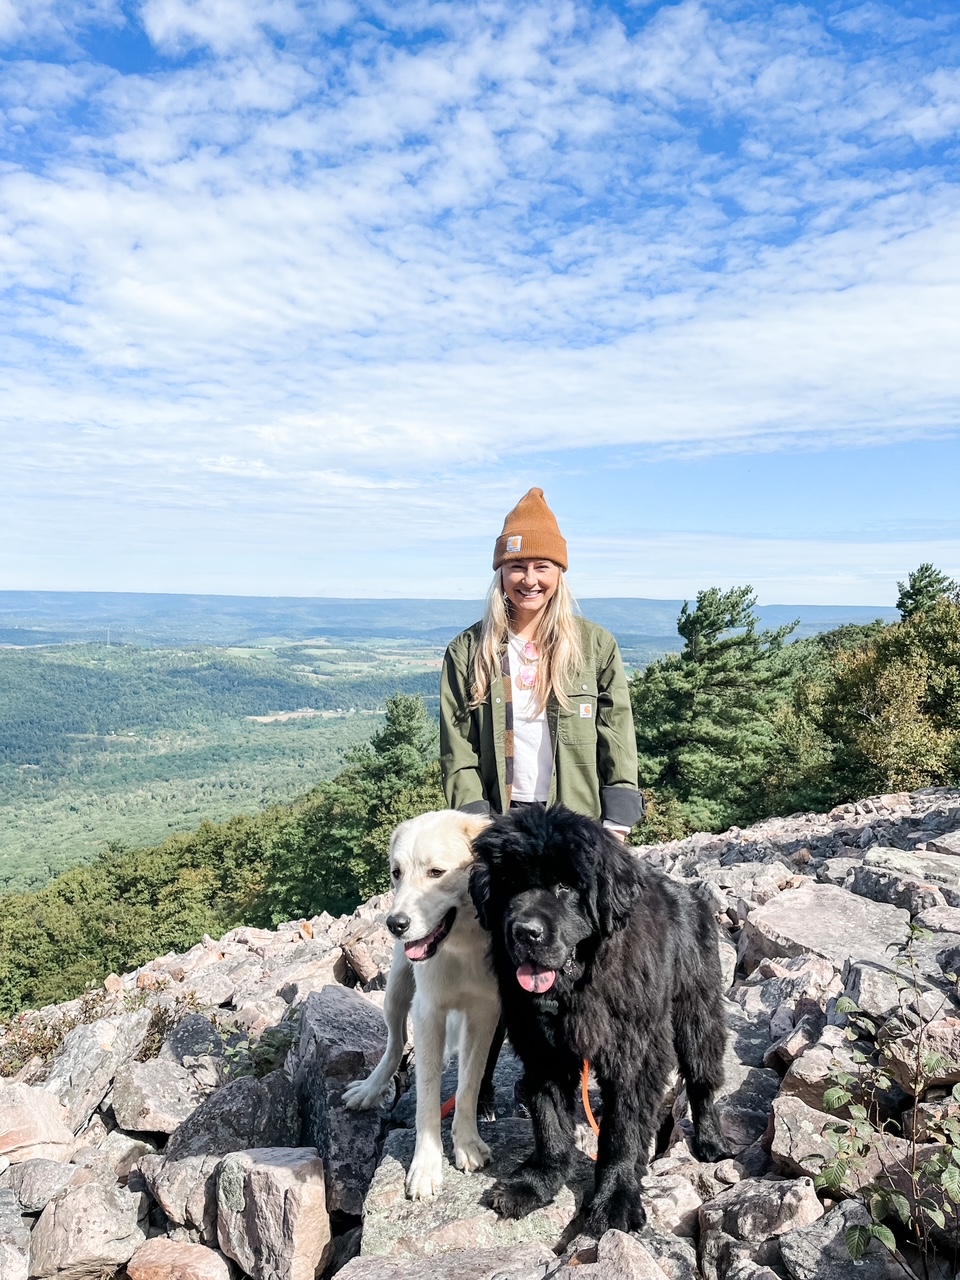
Next, we set out for our first hike of the day to the Stone Mountain Overlook. This hike was just over a mile and was a ton of fun for us and the dogs. A majority of the hike was stepping across huge rocks. The view at the top was breathtaking. We pulled out our waters and donuts and enjoyed the view!
Next, we made our way to Raystown Lake. This day was beautiful with blue skies and sun and the lake could not have been prettier. I know that Sammy was dying to jump in! We went to Hawns Overlook for a stunning view of the water and trees below. The birds flying by added even more beauty to the picturesque scene.
After Raystown Lake, we made our way back to Pittsburgh. Although we were only gone for a short time, Airydale Retreat and the surrounding area truly made us feel as though we were able to getaway and relax. I cannot thank Airydale Retreat enough for the amazing hospitality and fun recommendations of things to do and see. Airydale Retreat is the perfect place for couples, families, or a girls weekend!
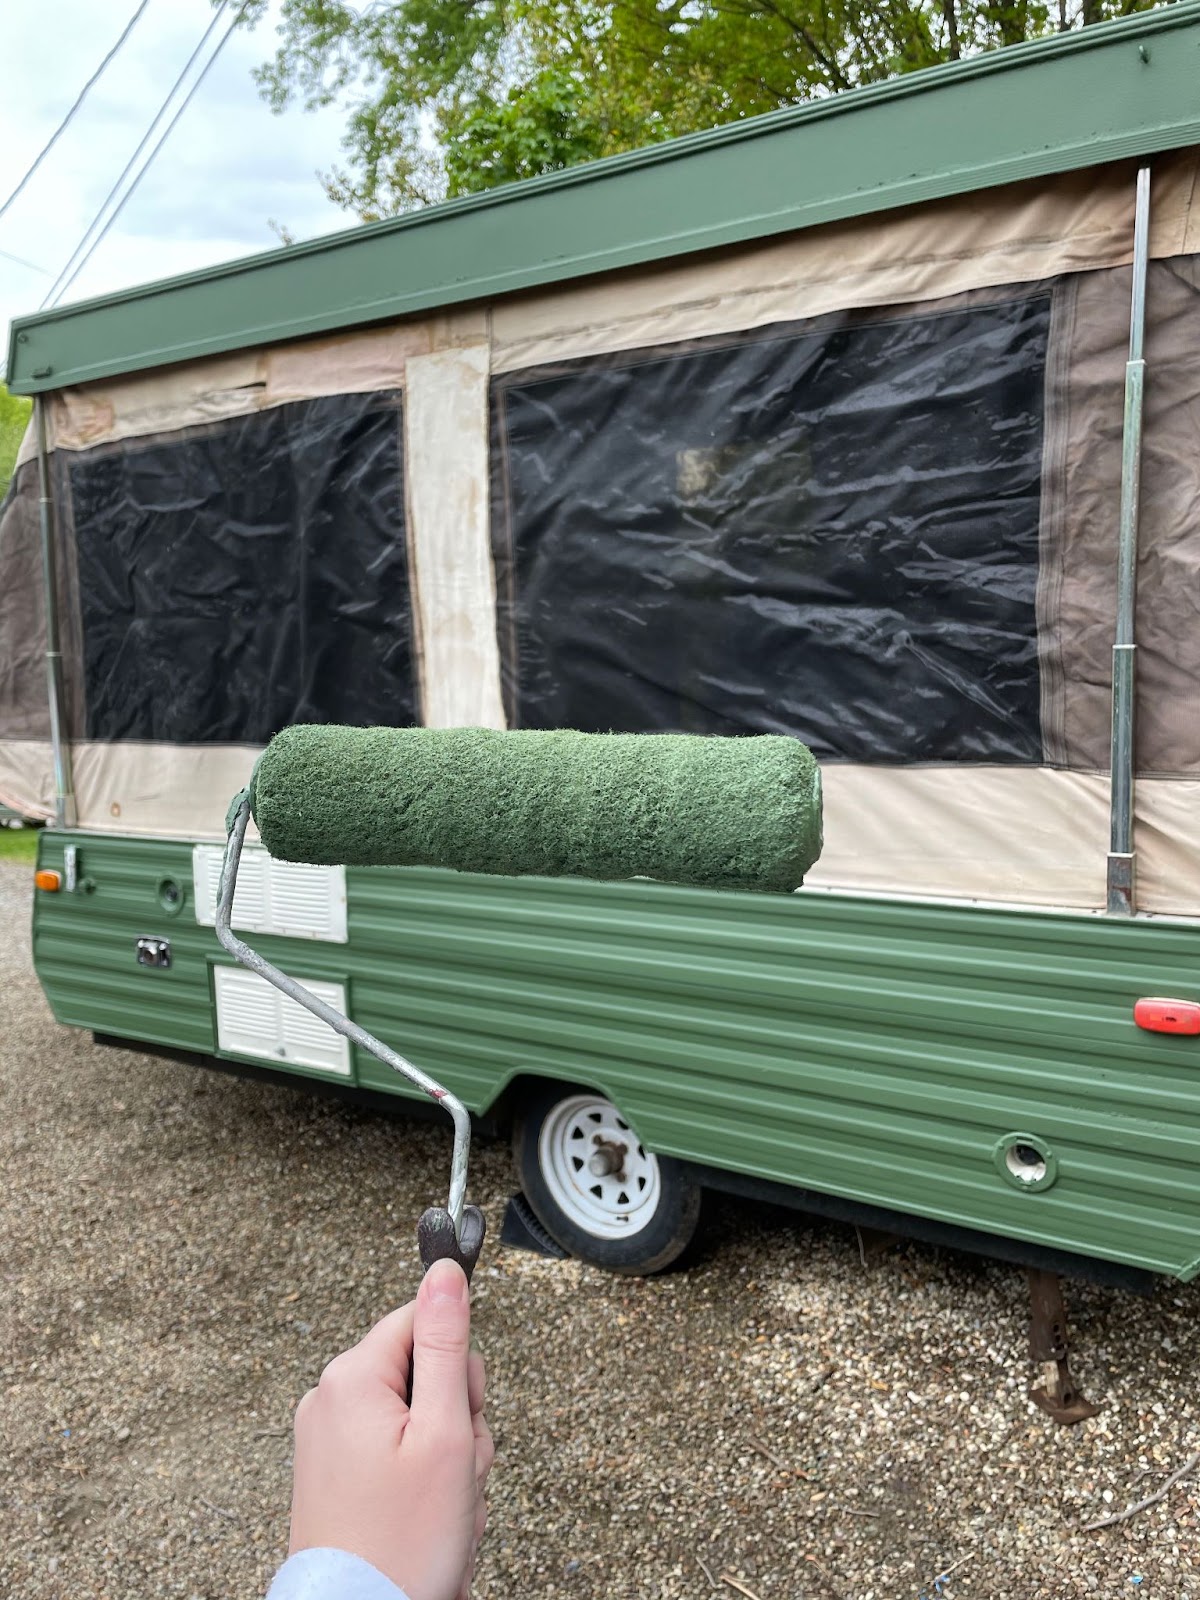
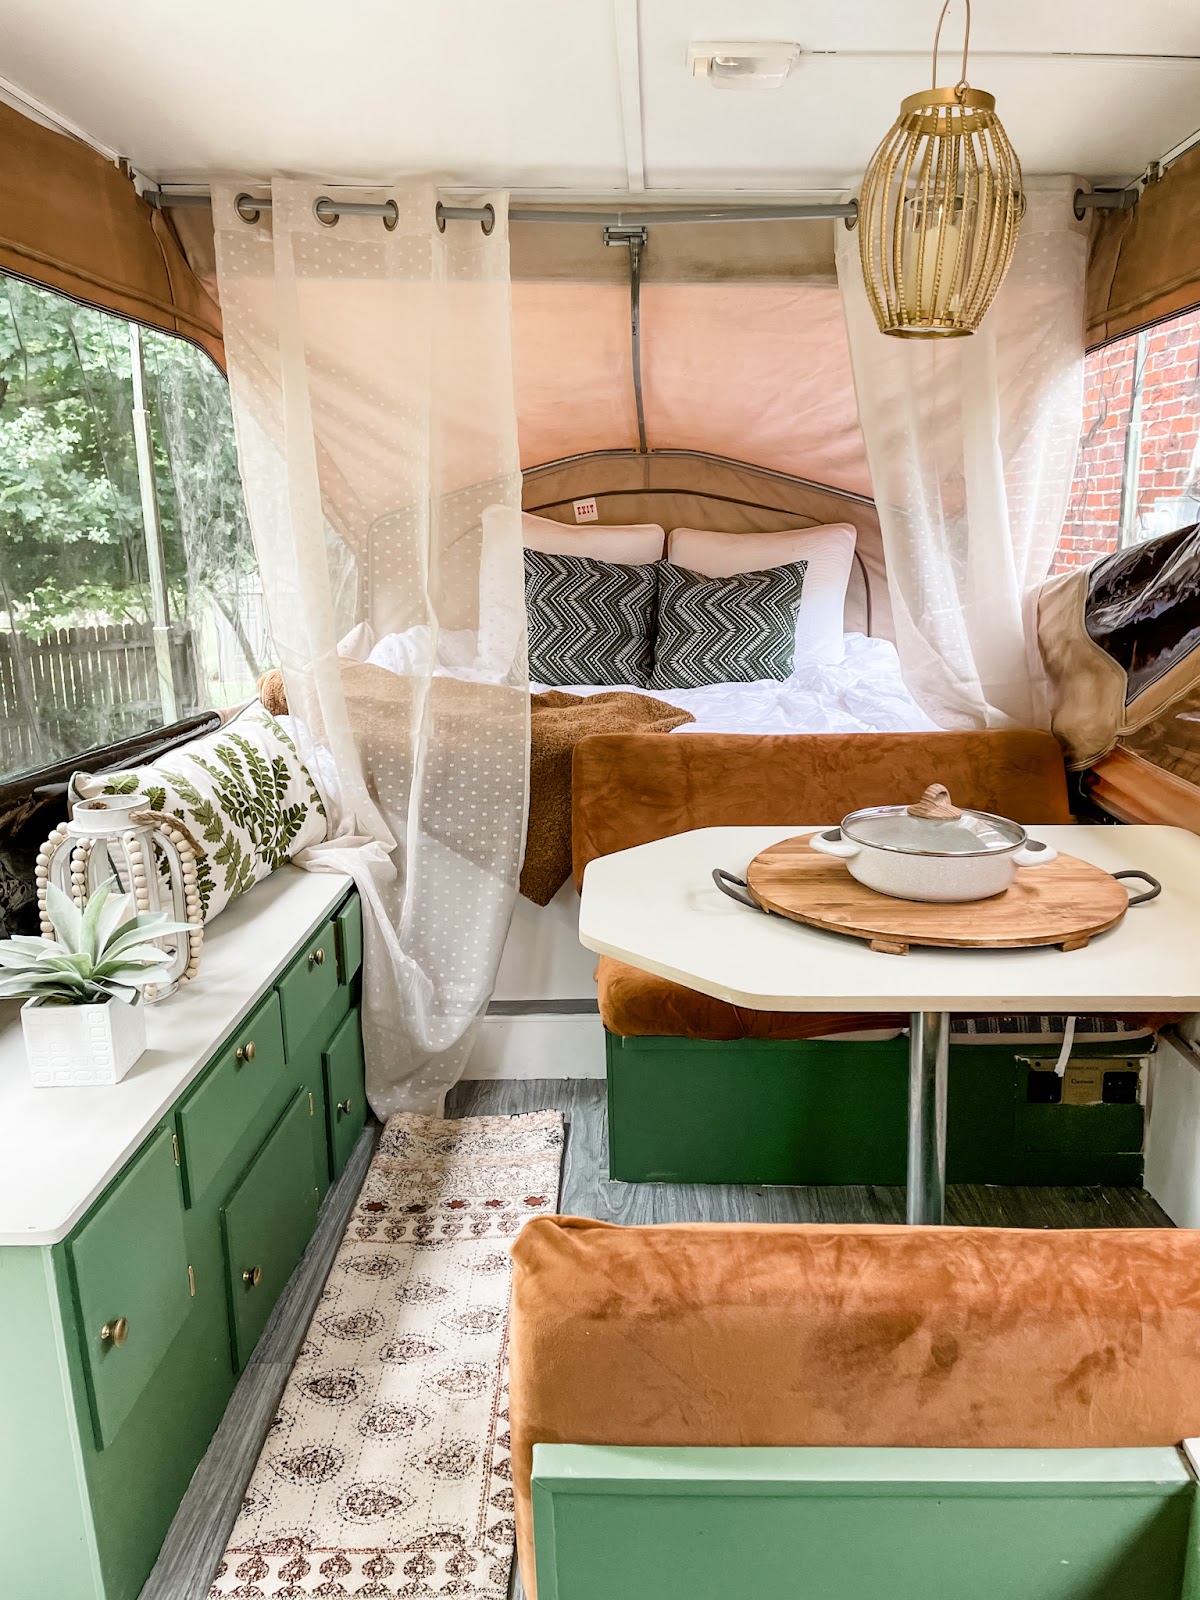
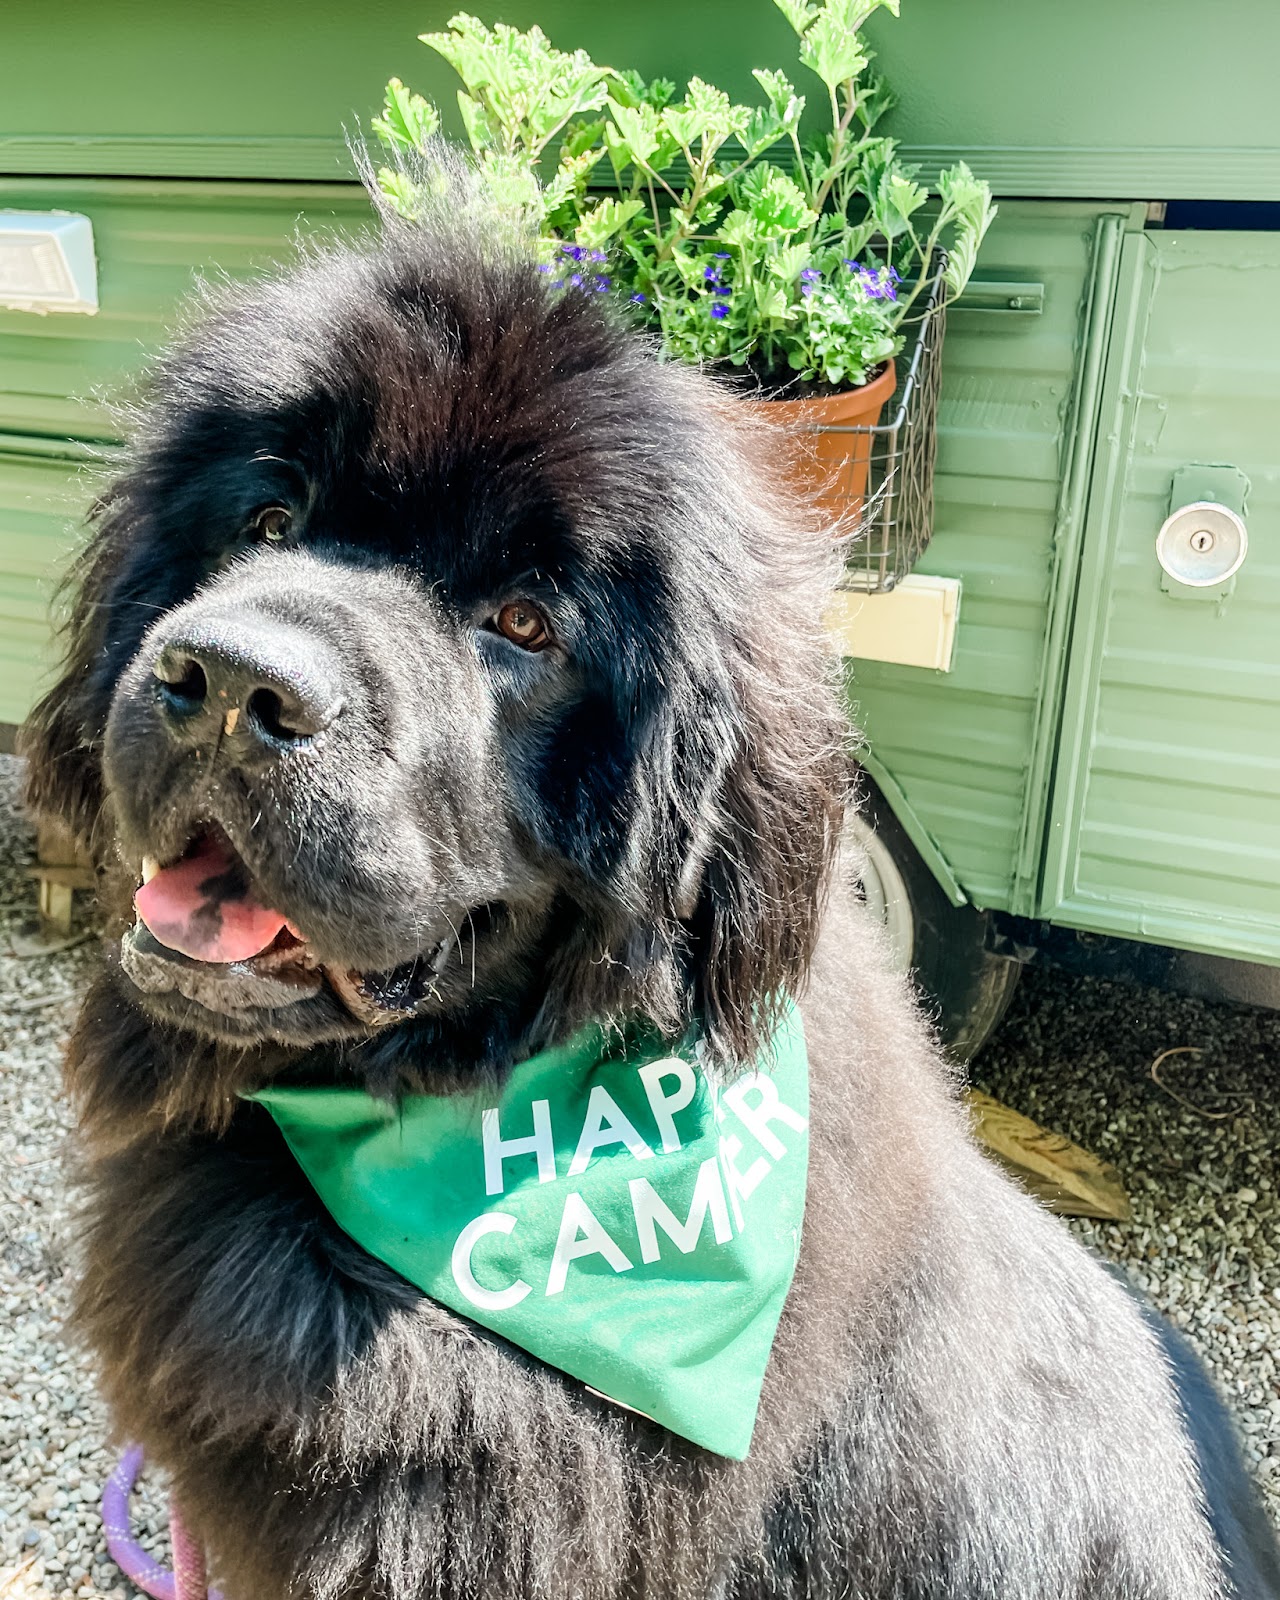
We have been wanting to travel, but wanted to get creative this year because of covid. I have been talking about wanting a camper for a while now, and we decided this was the year to do it. Finding the perfect camper was tough! Lots of people are looking for campers this year, so they have been going fast! We finally found a 1990 Jayco that we knew was going to be perfect for the two of us and Sammy. The main goal of our pop-up makeover was to do it on a budget. This blog post is going to share the tools we used, how we decorated it, and a few things that we learned along. Read along about how to give your Pop Up camper a Makeover!
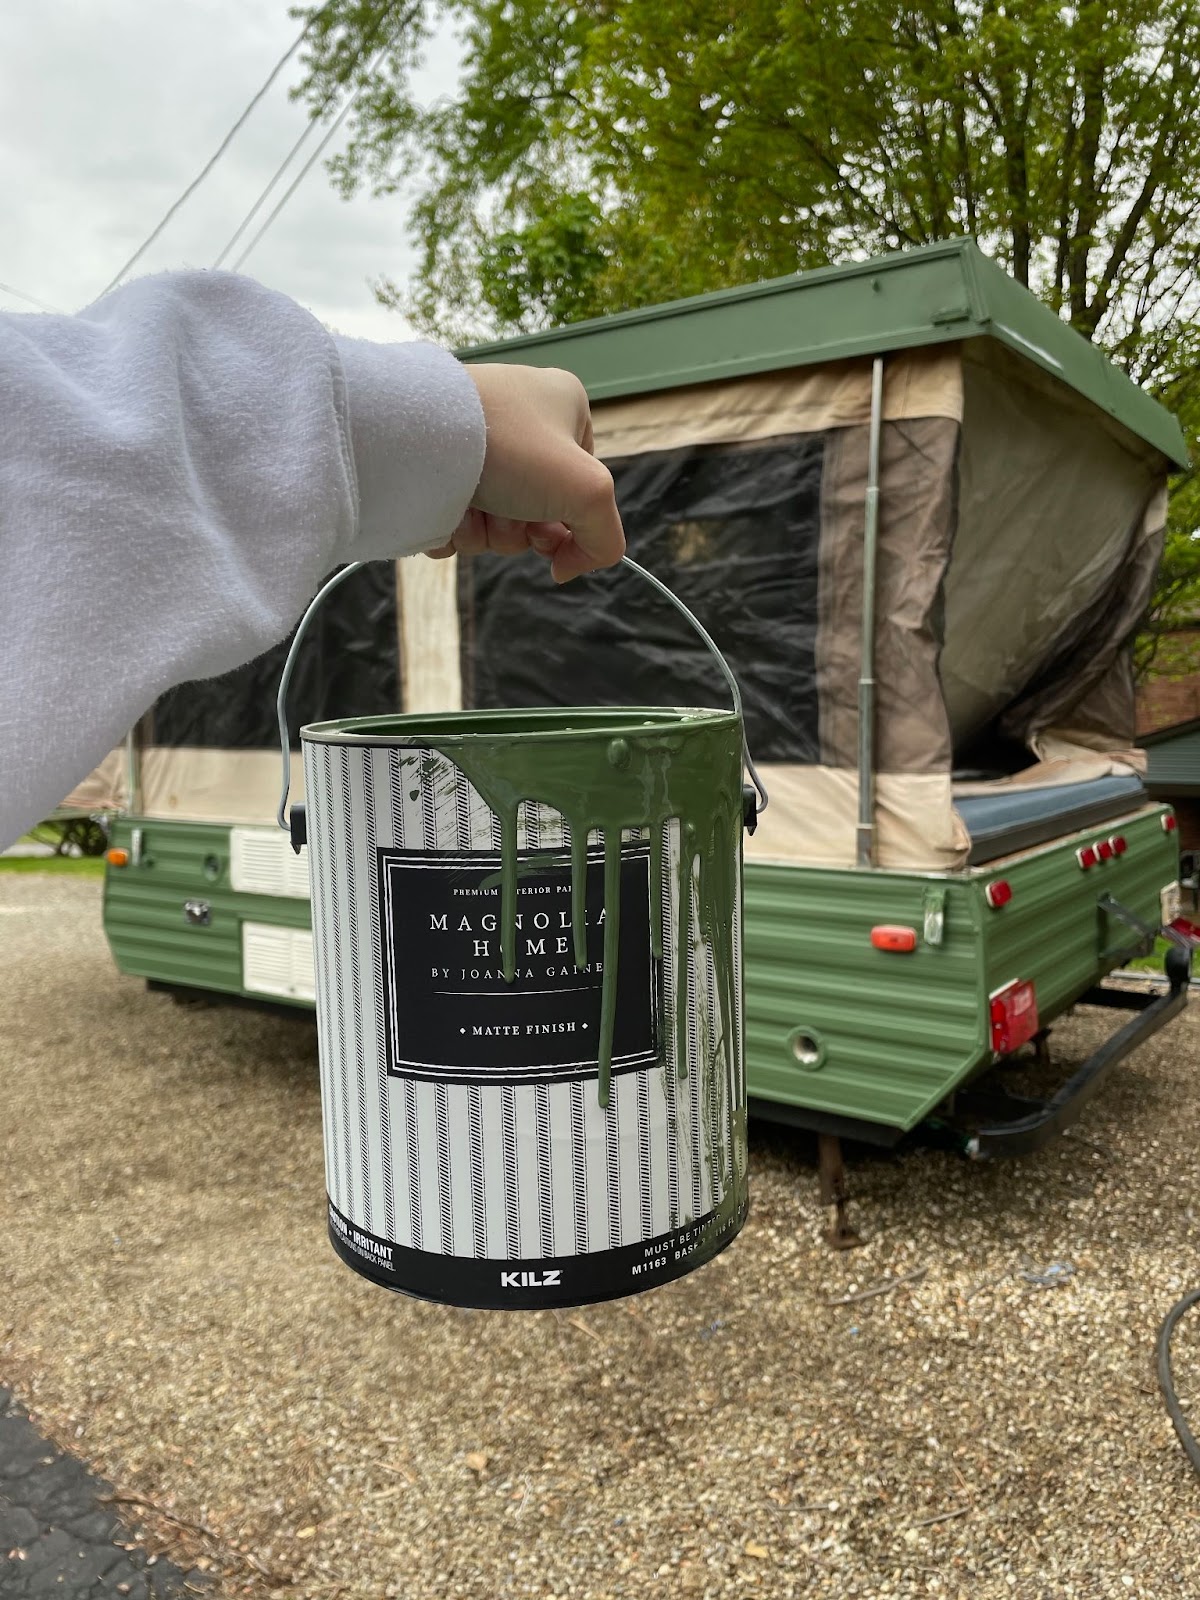
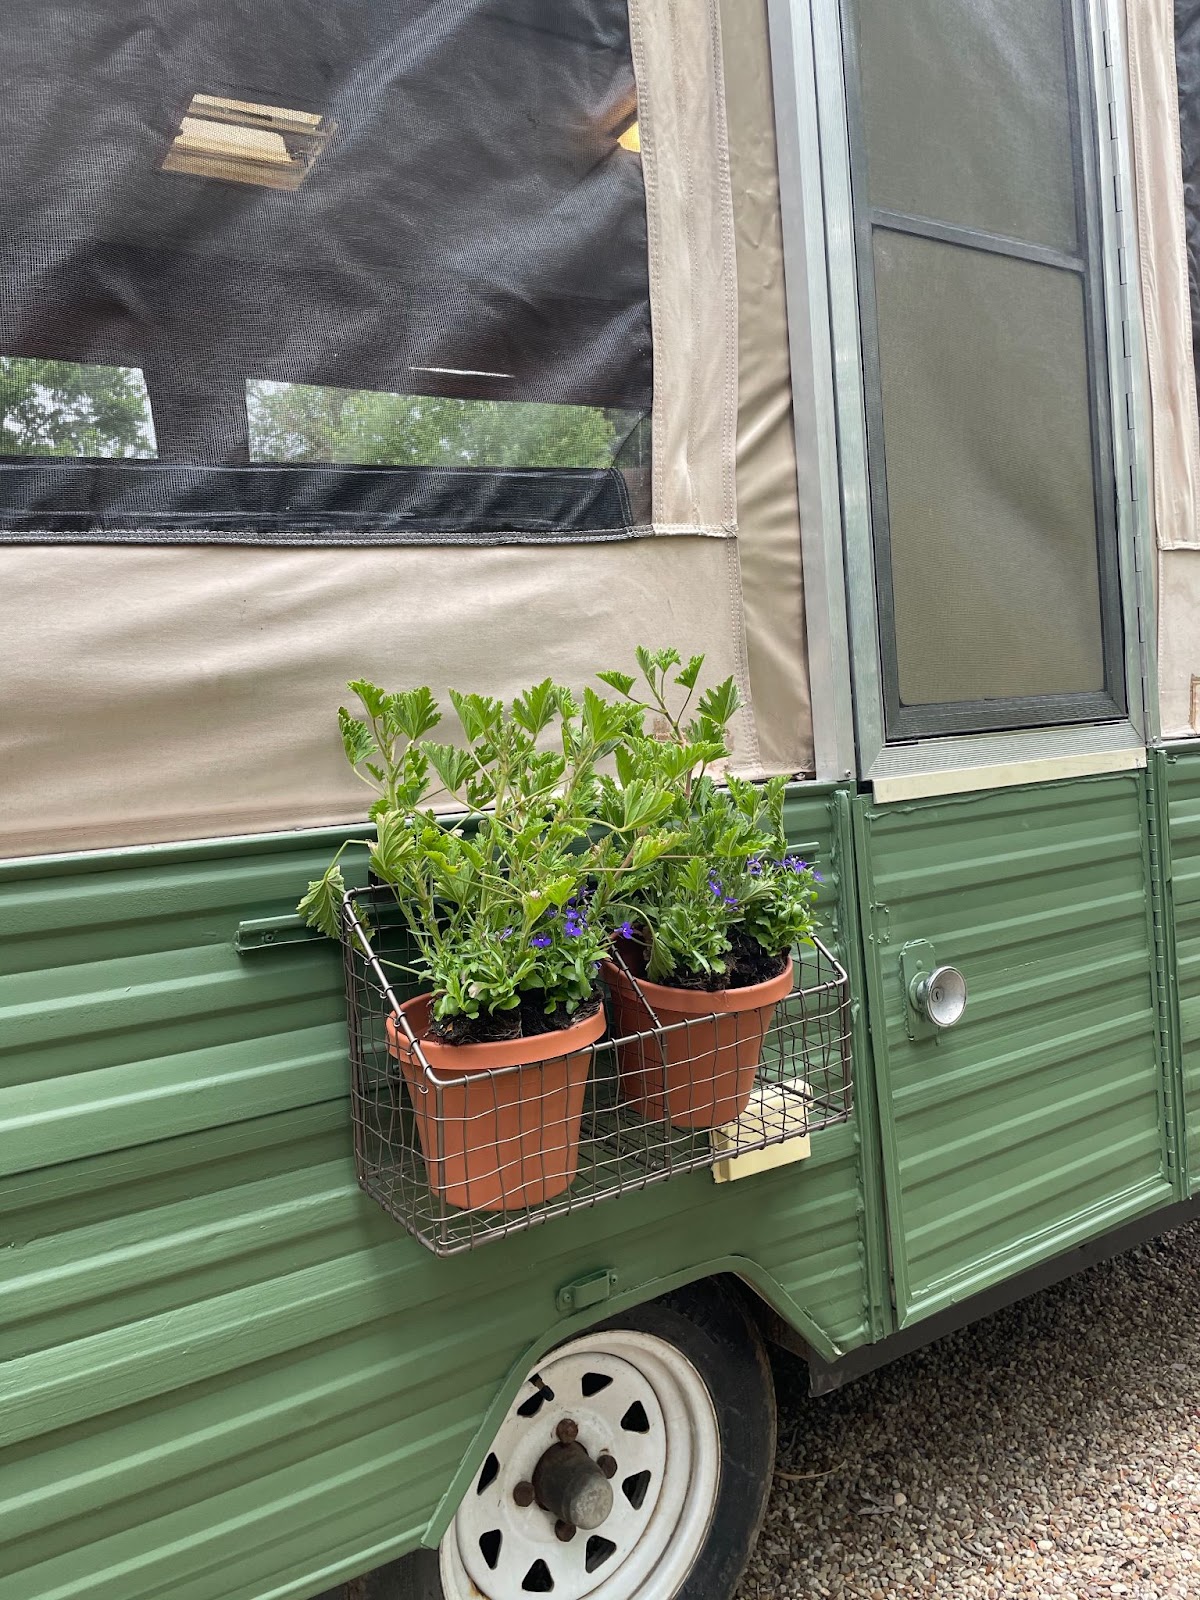
First, the exterior. We bought Magnolia Paints exterior paint from Wexford Ace Hardware in the color Lemon Leaves. I knew right away that this color was for us! The camper we bought was actually already painted, but we washed it down with soap, primed it, and then painted 2 coats of exterior paint. We tried a brush and a roller and definitely suggest rolling it. It’s already been through a lot of rain and is looking good.
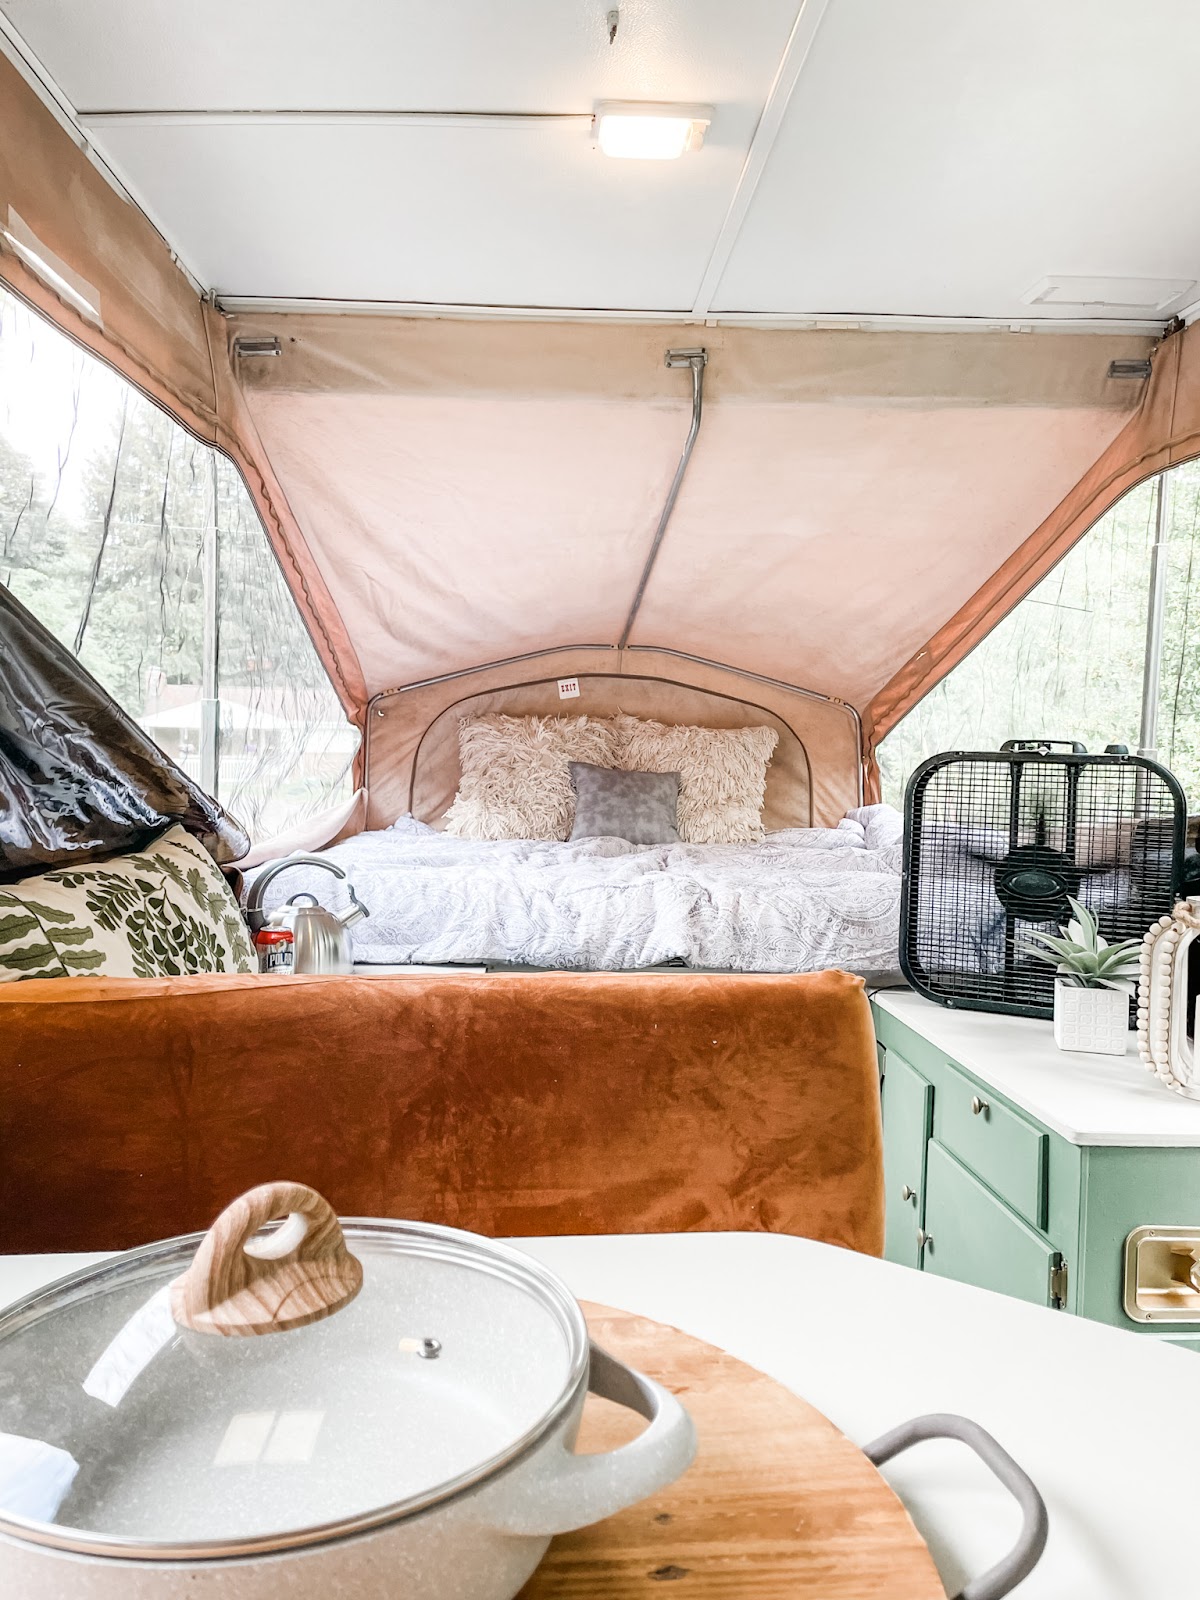
For the interior, we decided to use the same color. It’s a lot of green for sure, but a lot of fun! We bought Magnolia matte interior paint for the cabinets from Wexford Ace Hardware. For the countertops and table, we went with the color Renewed, also by Magnolia Paints. To add a little more dimension to our small camper, we went with white for the walls as a third color. We bought new knobs and hinges and spray painted them gold. I just love a gold accent!
Next, cushions and decor. Decorating was my favorite part of this whole project! I know that this is not the most practical part for camping, but it’s the most fun! For the cushions, I chose some chair covers that are kind of a rust color. You can buy them here! There are so many color options and are reasonably priced, too. I got 4 covers for about $35.
For the curtains, I used a 76 inch shower curtain rod and tan curtains similar to these. My pillows are from Home Goods and Wexford Ace Hardware. I chose white bedding which may seem risky, but I figure it’s the easiest to bleach! My lantern and wooden tray are also from Home Goods.
I have already gotten so many questions on my flower basket! I got this basket from Wexford Ace Hardware and the hooks on the back fit perfectly over the metal strips on my camper. If you want the basket, give them a call and they’ll ship to you! I also purchased 2 small plastic pots from the store and planted citronella plants in them with hopes to keep some bugs away!
We’ve officially survived one year of working from home in a pandemic. I don’t know about any of you, but I have completely fallen in love with the loungewear trend that grew out of working from home. We’ve grown accustomed to more casual wear because we are conducting business within our own homes. No one will look at you twice at the grocery store if you’re wearing a matching, oversized sweat set during the day! However, we must remain semi-presentable for our colleagues and supervisors when meeting over Zoom. So, the perfect balance between comfort and professionalism created what we now refer to as “elevated loungewear.” To welcome spring, I have created a post dedicated to this trend, including comfy co-ords, cozy options for an extra layer during those wintery spring days, intimates for the early mornings or late nights, and helpful accessories.
So, Here are some outfits to wear while working from home this Spring
What have been wearing while working from home? I have been loving all of the above trends, but the matching sets are by far my favorite! Have you read my recent post on straight versus skinny jeans? I’d love to hear from you!
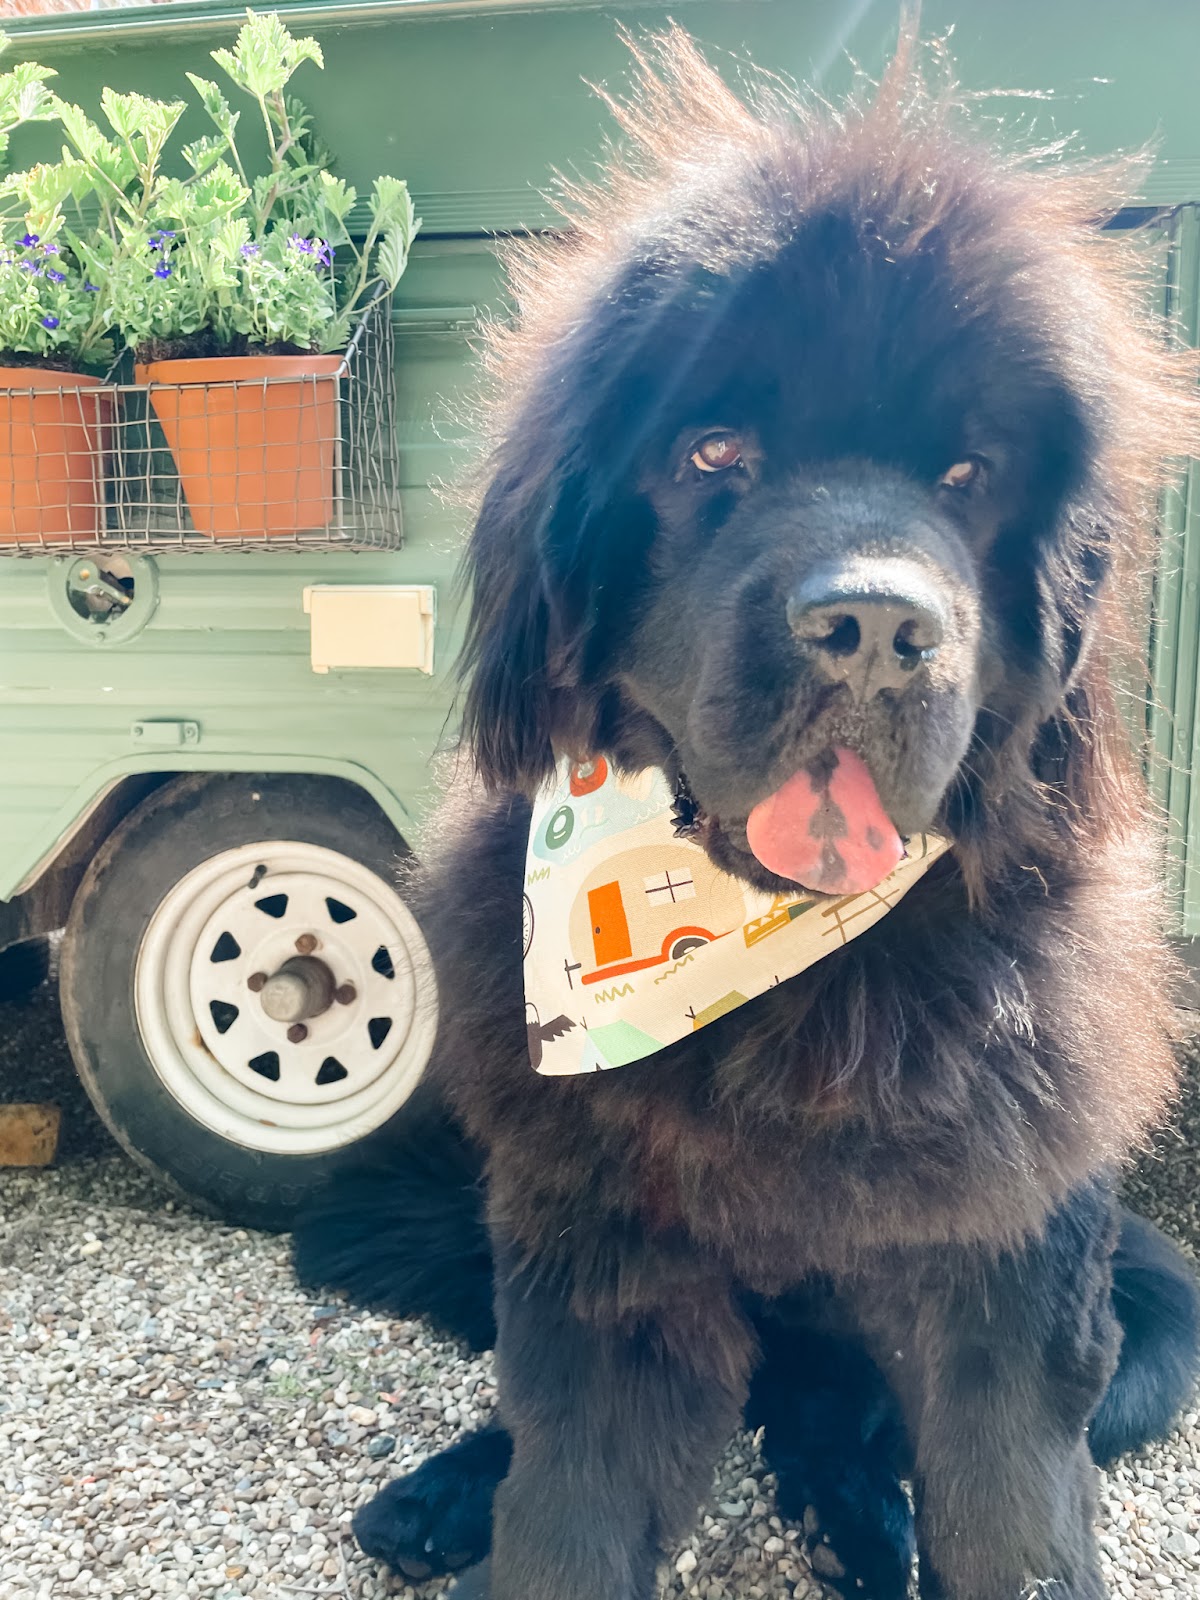
I cannot believe Summer is just right around the corner! This means lots more activities for us to do with our dogs! Tristan and I recently started an Etsy Shop called One Floofy Newf. We are selling handmade dog bandanas, collars, and personalized dog hats that every dog mom will love! Definitely check us out on Etsy and Instagram and tell your dog-loving friends, too! I’m sharing a few of my favorite dog accessories from our shop that every dog mom needs.
This Custom Dog Breed Embroidered Baseball Hat
This hat is my all-time favorite accessory to wear. It has a Newfoundland on it that looks just like my Sammy! You can order this hat with your dog breed on it and even have custom text added to the back with your name or your dog’s name! This embroidered hat comes in so many different color options and the dog on the front will be made to look just like your pup! Check out the golden retriever hat, too!
This bright orange over-the-collar bandana is a must-have if you are taking your dog on hikes this Summer. Find your dog easily in the woods and allow others to see your pup do by putting this bright orange bandana on. It has the phrase “hiking buddy” which is so cute, too!
This Banana Leaf Over the Collar Dog Bandana
This banana leaf printed bandana is so much fun and just screams Summertime! I love the way this bandana looks on my Newfoundland, Sammy. He looks so cute with a bright-colored bandana!
if you’re looking for more Sammy Content, check out this post and story about how he went viral on TikTok!
We’ve come a long way from billowing court dresses and corsets, wouldn’t you say? Because I can’t imagine a time when a good pair of jeans wasn’t a part of my capsule wardrobe. These days, we have endless options to choose from: styles, washes, lengths, waists, trimmings… the list goes on. The current argument, however, is straight versus skinny. Which is better? I know some Gen z’s vs. Millennials differ on this, but I am loving both this season!
Straight and Skinny jeans both have their own time and place, depending on personal style and occasion. Straight leg cuts can easily slip into the more casual category due to their baggy fit and destroyed knees. However, Target’s Levis 501s and Madwell’s Stovepipes are great choices for a more fitted, put-together look. Skinny jeans can also be super versatile, but are typically frowned upon when worn in more formal situations. Tight fitting items and rips in fabric are generally seen inappropriate or unprofessional by more conservative audiences.
Let’s quickly touch on stereotypes. Millennials, like myself, are currently witnessing the rise of Gen Z, now that they are reaching their teens and 20’s. Long gone are the days when we ruled the school with our hair parted on the side, carrying Michael Kors purses from TJMaxx. Today, we wake up every morning trying to understand the next TikTok trend and question why low-rise clothing is once again the “style.” Well, just as skinny jeans used to be the “it” fit, straight leg cuts and baggy silhouettes have taken their place. So, while they are not necessarily out of style (can still easily be found in stores, and will look super cute with that floral blouse from LOFT Ann Taylor), the skinny looks can pretty easily set you and I apart from our generational neighbors.
So, let’s dip our toe in the water. While we don’t necessarily have to revert all the way back to the marshmallow-like mom jeans of the 80s and 90s, maybe the incorporation of some less form-fitting styles can help us wade into the Gen Z culture.
Here are some amazing straight and skinny jeans you will love this season!